In this tutorial I’ll show you how to create a beautiful field scene using a variety of photo manipulation techniques. You’ll work with blending, retouching, adjusting color, creating lighting effect, working with group and more.
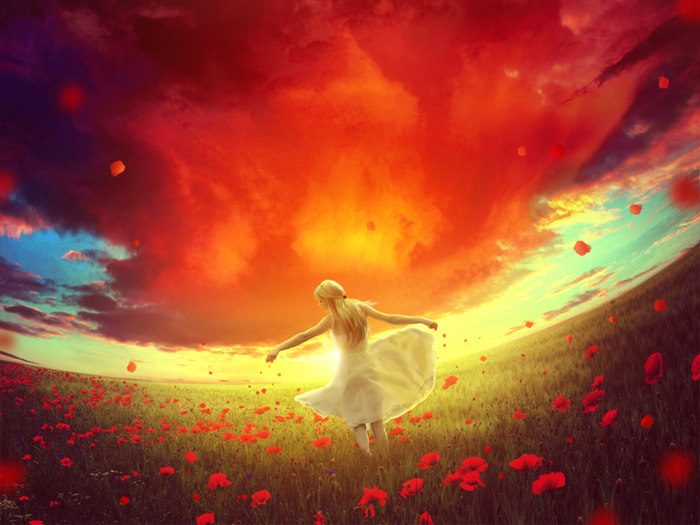
The Final Image
Required Resources:
Sky 1 – http://pixabay.com/en/sunset-stunning-sunset-218946/
Sky 2 – http://morguefile.com/archive/display/822390
Field – http://pixabay.com/en/field-of-poppies-brandenburg-nature-50588/
Model – http://twilitesmuse.deviantart.com/art/Light-on-Her-Feet-286467049
Petals – http://redheadstock.deviantart.com/art/Rose-Petal-Photoshop-Brushes-51026649
Light – http://jennyle88.deviantart.com/art/Light-effect-1-461944120
Grass brushes – http://redheadstock.deviantart.com/art/Grasses-and-Plants-PS-Brushes-19490103
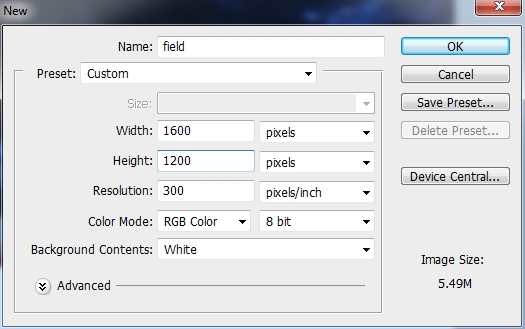
Step 1
Create a new document in Photoshop with the given settings:
Step 2
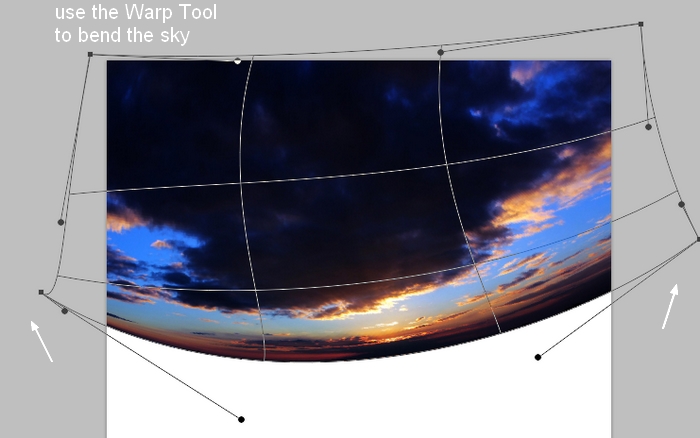
Open the sky 1 image. Use the Move Tool (V) to drag it into our white canvas, then use the Cmd/Ctrl+T key to rotate the sky to create an angle, also use the Warp Tool (Edit > Transform > Warp) to bend the bottom of the sky as shown below:
Step 3
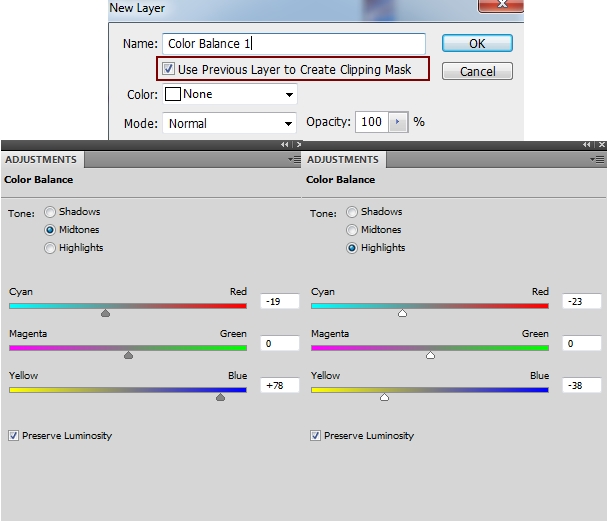
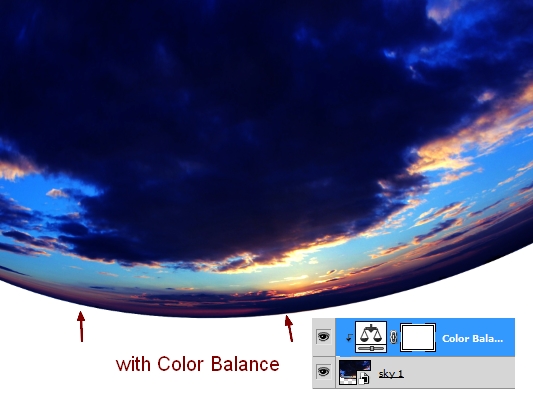
To change the color of this sky I used an adjustment layer with Clipping Mask. Go to Layer > New Adjustment Layer > Color Balance:
Step 4
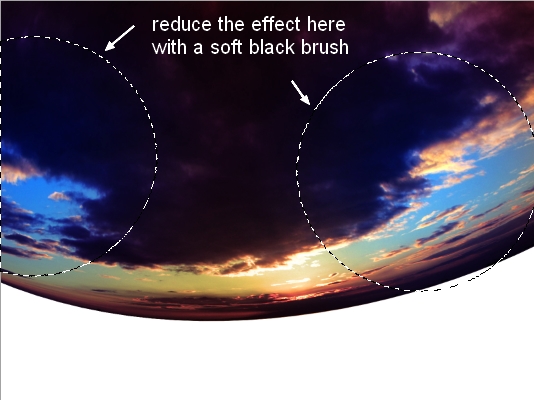
I used a Photo Filter adjustment to add some orange color to the sky:
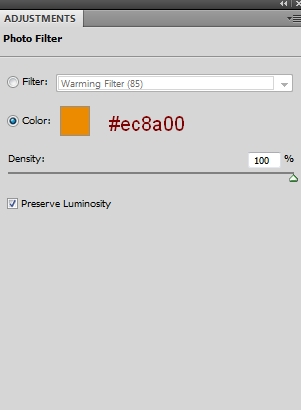
On this layer mask use a soft, basic brush with black color to reduce this color effect on the two sides:
Step 5
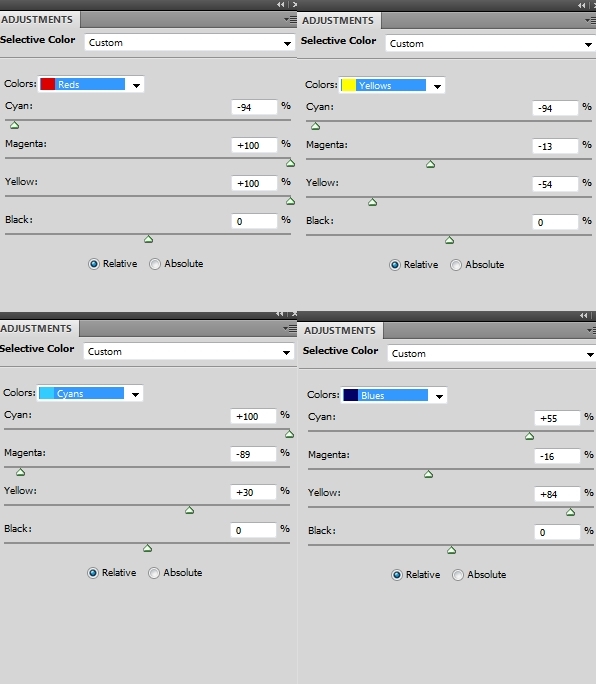
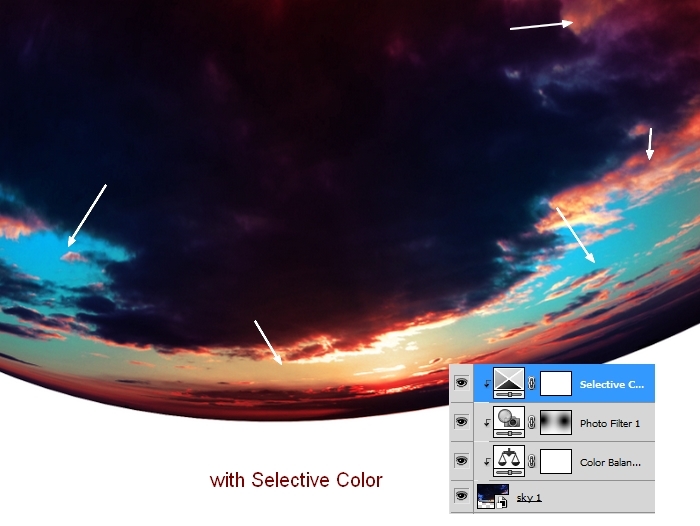
To add some red and cyan to the sky I used a Selective Color adjustment layer:
Step 6
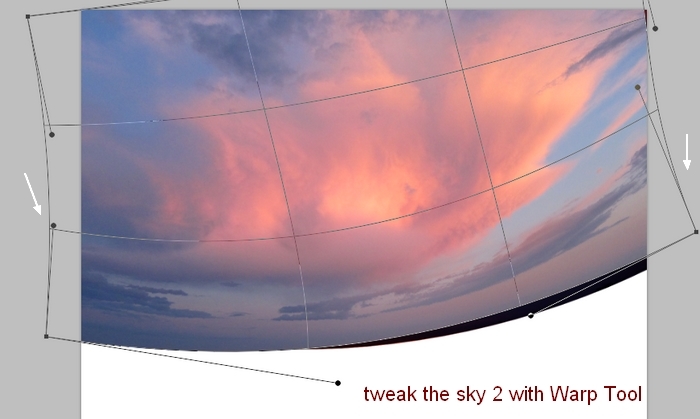
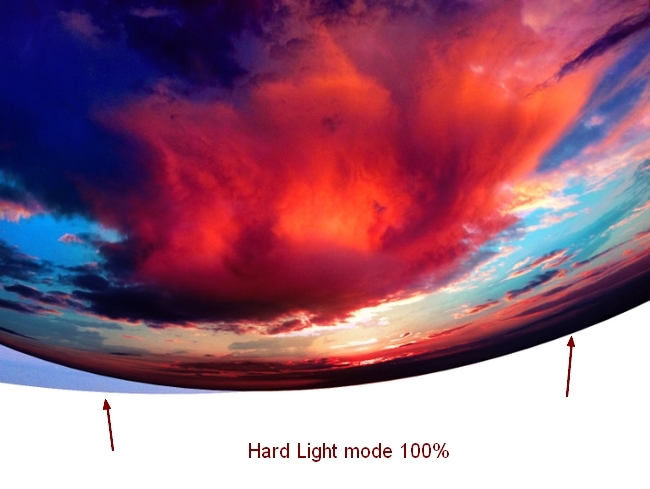
Open the sky 2 image. Place it onto the sky 1 and use the Warp Tool to tweak it as done with that sky:
Change the mode of this layer to Hard Light 100%:
Step 7
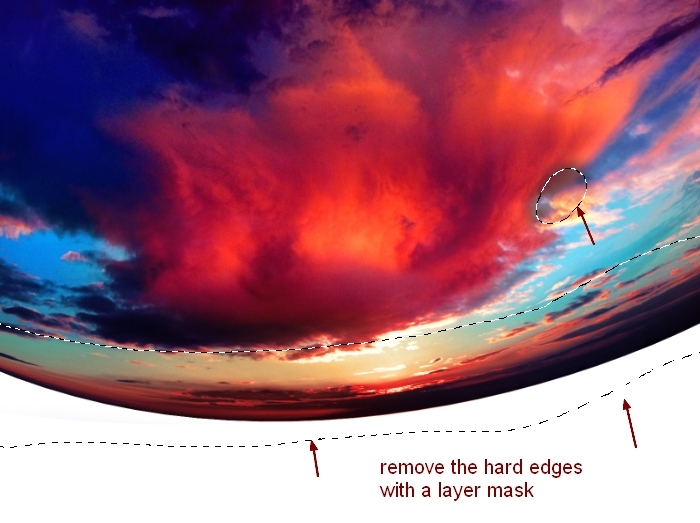
Click the second button at the bottom of the Layers Panel to add a mask to this layer. Use a soft black brush to remove the hard edges and blend this sky with the sky 1:

Step 8
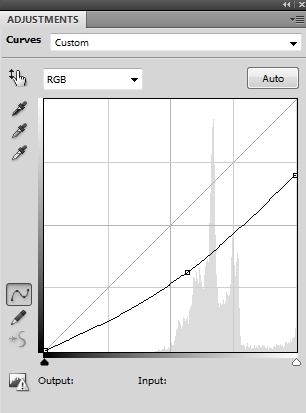
I used a Curves adjustment layer (clipping Mask) to darken some parts of this sky:
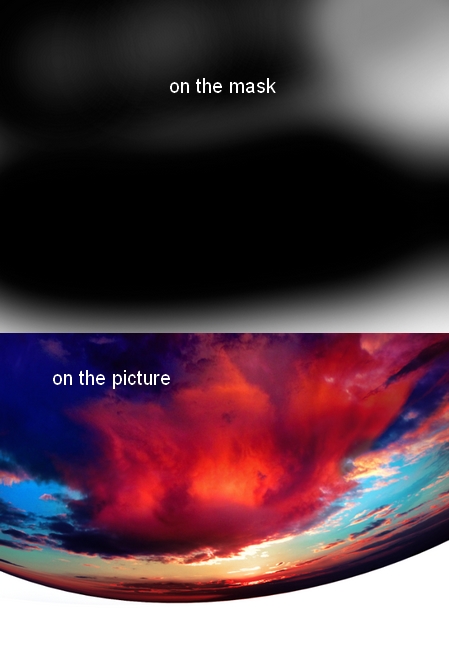
On this Curves layer mask use a soft black brush to erase the dark effect on the parts you don’t want to be afftected by this adjustment layer. You can see my result on the layer mask and on the picture:
Step 9
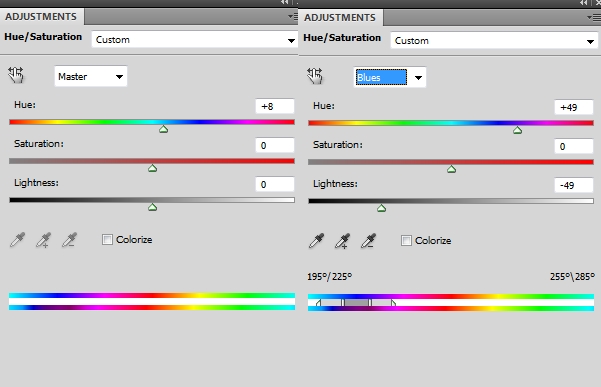
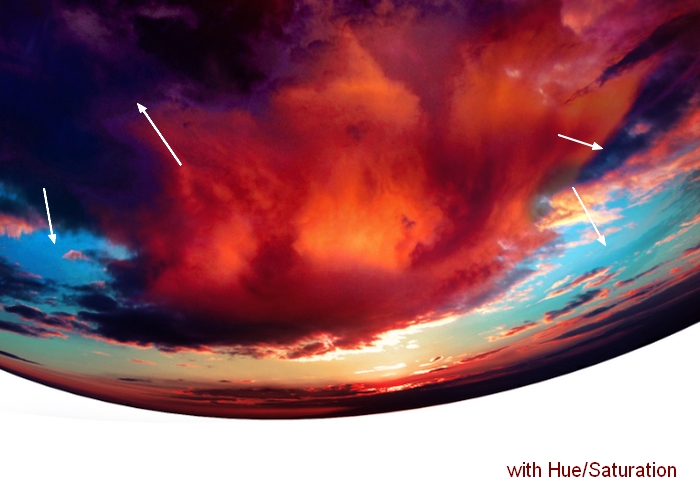
I used a Hue/Saturation adjustment to change the color of this sky a bit: